Frontend Preview
- How To Create To Radio Variation Swatches For Global Attributes
- How To Create To Radio Variation Swatches For Manual Attributes
- How To Create To Radio Variation Swatches From Scratch
.
How To Create Radio Variation Swatches For Globally Created Attributes
Video Tutorial
Head to the Products >> Attributes. All existing global attributes are listed in the attribute list page section. After installing WooCommerce Variation Swatches plugin, it adds Type field. By default it would show Select under Type title.
 As WooCommerce Variation Swatches Plugin comes with 4 attribute types: Color, Image, Button and Radio. You can set any of attribute type for your desired attribute.
For demonstration purpose, Size attribute has been created. We’ll add Radio attribute type for Size attribute.
To set Radio attribute type to Image attribute, click on Edit.
As WooCommerce Variation Swatches Plugin comes with 4 attribute types: Color, Image, Button and Radio. You can set any of attribute type for your desired attribute.
For demonstration purpose, Size attribute has been created. We’ll add Radio attribute type for Size attribute.
To set Radio attribute type to Image attribute, click on Edit.
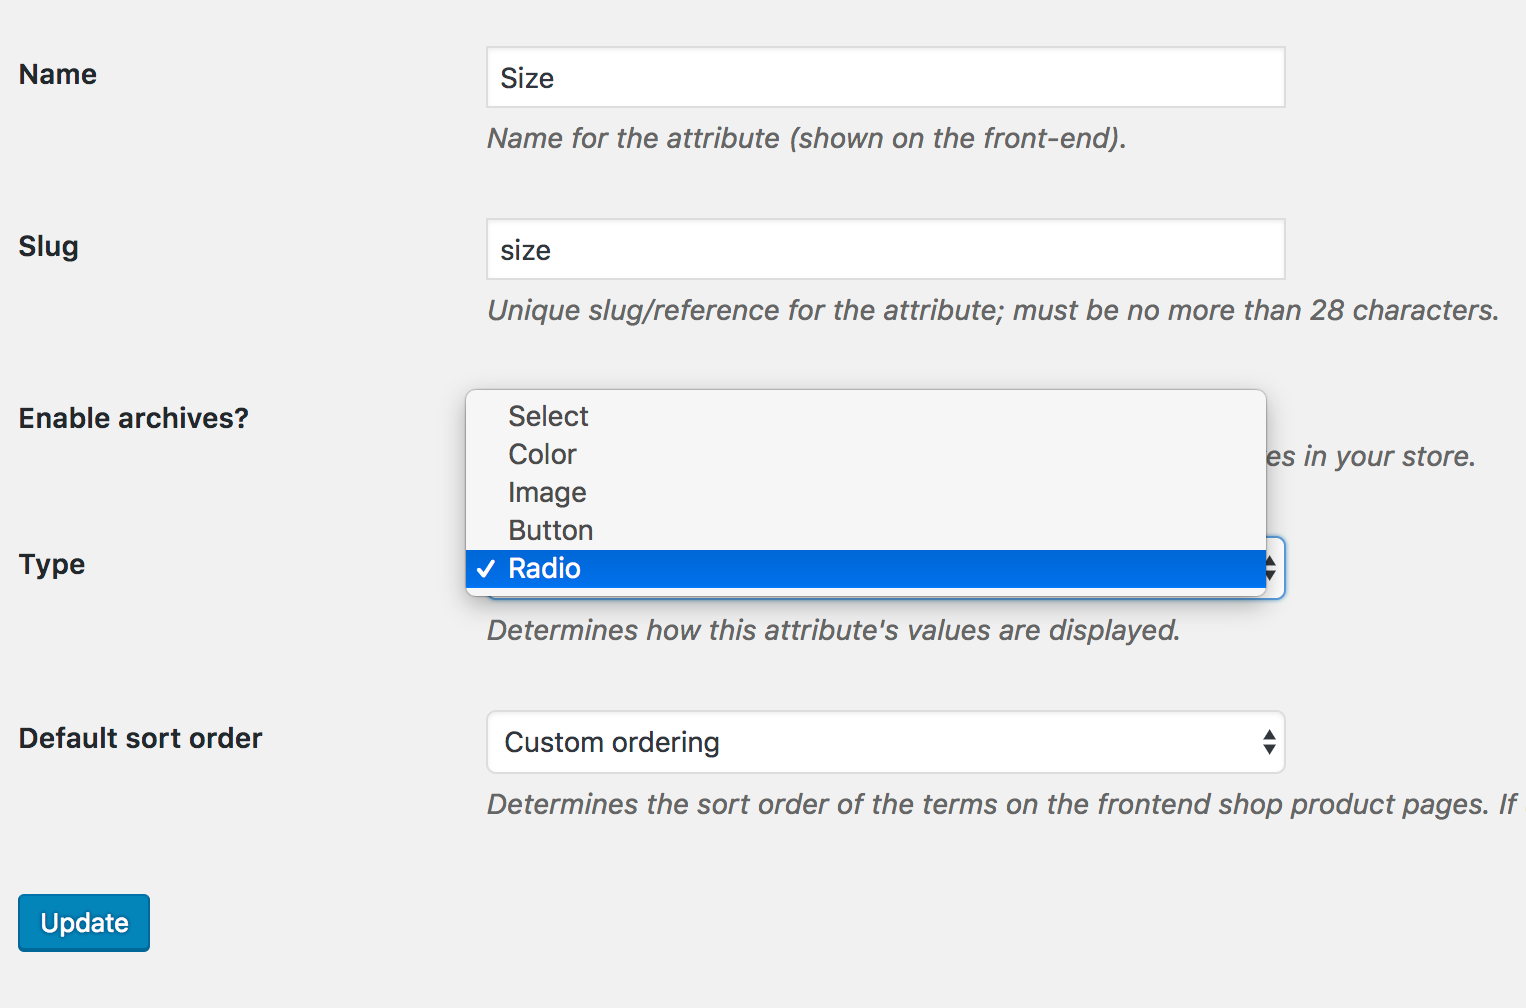
 After selecting edit link, it will open attribute editing panel. Select Radio Type from the type dropdown.
 When attribute type selection is completed, get back to the attribute list page. The Attribute list would look like the following image. Now Size Attribute is showing Radio type instead of default Select type.
 After selecting attribute type, the frontend of the product would look like the following screenshot. Don’t be panic, if you find your attribute variations weird. It happens because you haven’t set any image for variations yet.

.
How To Create Radio Variation Swatches From Manually Created Attributes
Video Tutorial
Step O1: Pro Plugin Setup If you have variable products in your store and don’t have product attributes created globally, it means you have created attribute and it’s variations manually. To convert manually created attribute variations into image swatches, make sure you have premium version of WooCommerce Variation Swatches created. [button style=”rounded-btn” text=”Live Demo” button_link=”https://demo.getwooplugins.com/woocommerce-variation-swatches/product/cap-2/?radio-doc-demo” link_target=”_blank” type=”medium-btn” bg_color=”#333333″ text_color=”#FFFFFF”] [button style=”rounded-btn” text=”Upgrade to Premium Version” button_link=”http://bit.ly/label-manual-doc-pro” link_target=”_blank” type=”medium-btn” bg_color=”#56bfd4″ text_color=”#FFFFFF”]
Step O2: Change Manual Attribute Type
If you head to your Attributes tab from product data inside your product edit mode, and found variations are separated by pipe sign like the following screen. It means you have created variation manually.’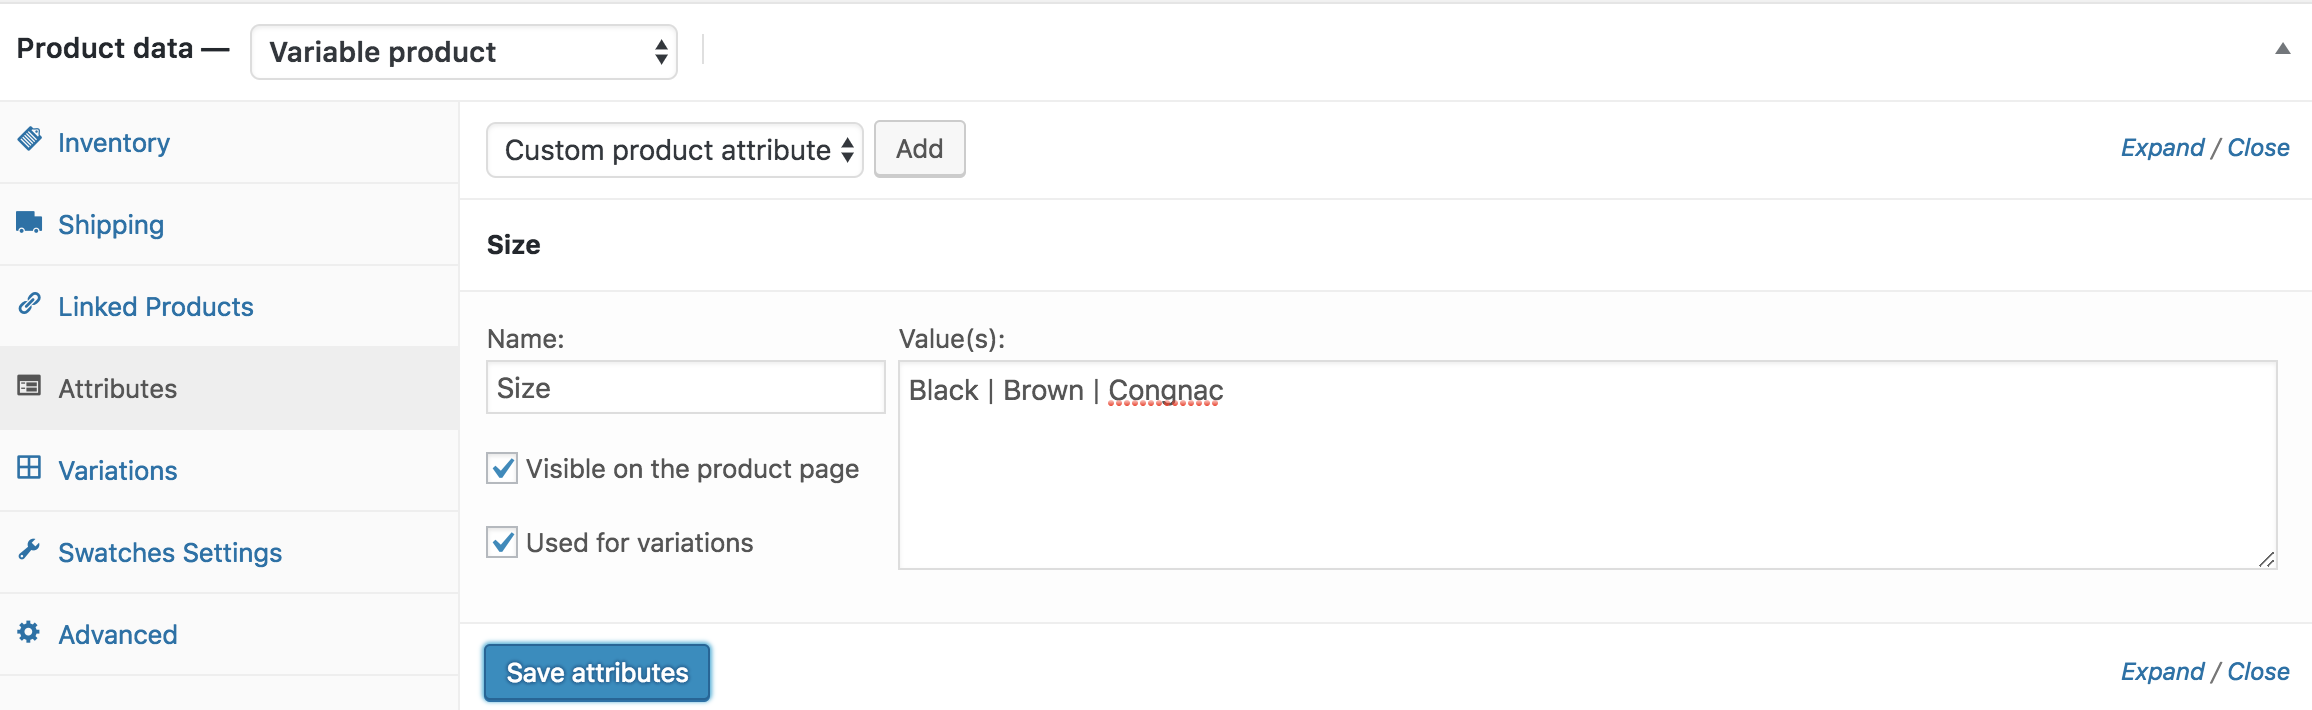 To Convert these manually created attribute variations, head to Swatches Settings tab, and select Radio type from Select (Default) Dropdown.
 After selecting attribute type, the frontend of the product would look like the following screenshot.
.
After selecting attribute type, the frontend of the product would look like the following screenshot.
.
How To Create Radio Variation Swatches From Scratch
Video Tutorial
Step 01: Create Attribute
At first, we have to create radio attribute and its variations globally. To create radio attribute globally, navigate to Products >> Attributes. As we’ll create radio attribute for our product. Fill the name field with your desired attribute name. In this tutorial, I’ve termed attribute name: Size. You can leave Slug field empty. It automatically generates the slug for the attribute. From the Type dropdown select radio attribute type. When the mandatory fields are filled, select Add Attribute button.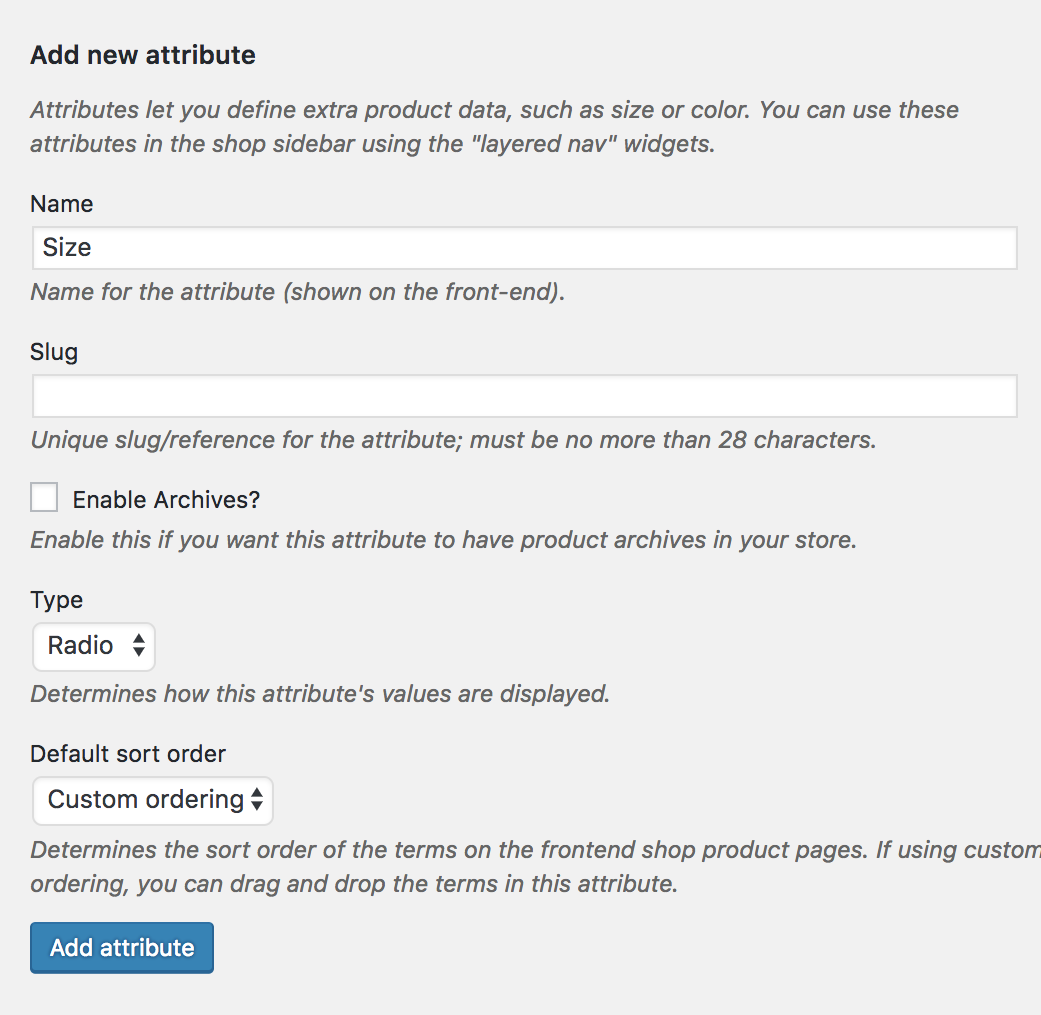 After creating attribute, you will notice a list is created in the right side. Check the following screenshot.

Step 02: Create Attribute Variations
The more variation you would add, they would get added to this list. When an attribute is created, we need to create attribute variations. To create product variations, click on the Configure terms from the attribute list. As we have created a radio attribute. We’ll add label title as variations inside the button attribute. In this tutorial, we’ll add Small, Medium, and Large variations. To create variations inside radio attribute. Fill the Name field with your desired variation name, leave the slug field empty and save the setting each time.

Step 03: Enable Attribute Variation in Variable Product
It’s time to enable radio swatches inside a variable product. To enable radio swatches in your desired product. Get into your desired product edit mode. Make sure you have variable product selected from Product Data.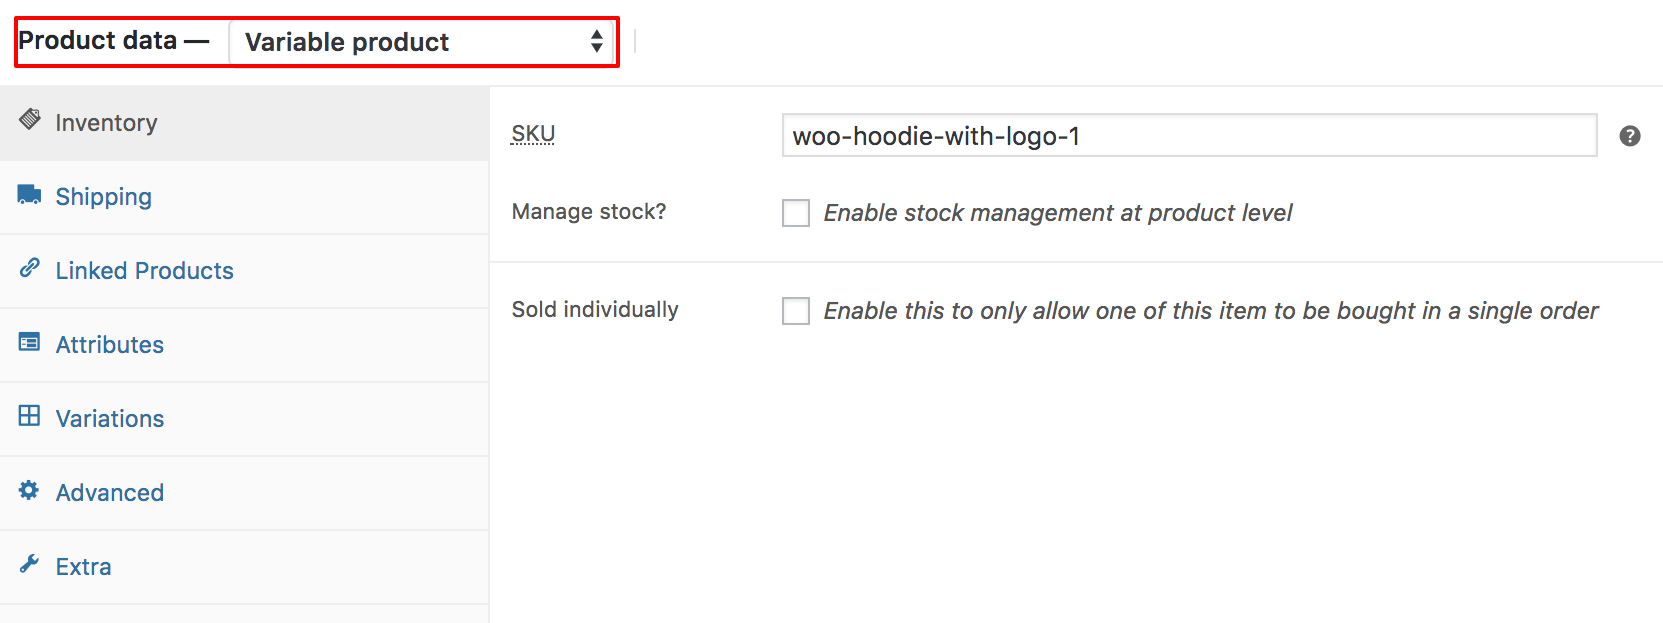 After selecting the Variable product from Product data dropdown, head to the Attributes Tab. Click on Custom product attribute dropdown. In this dropdown, you can see all your globally created attributes. As we’ve only created a Size attribute, it’s now showing Size attribute.
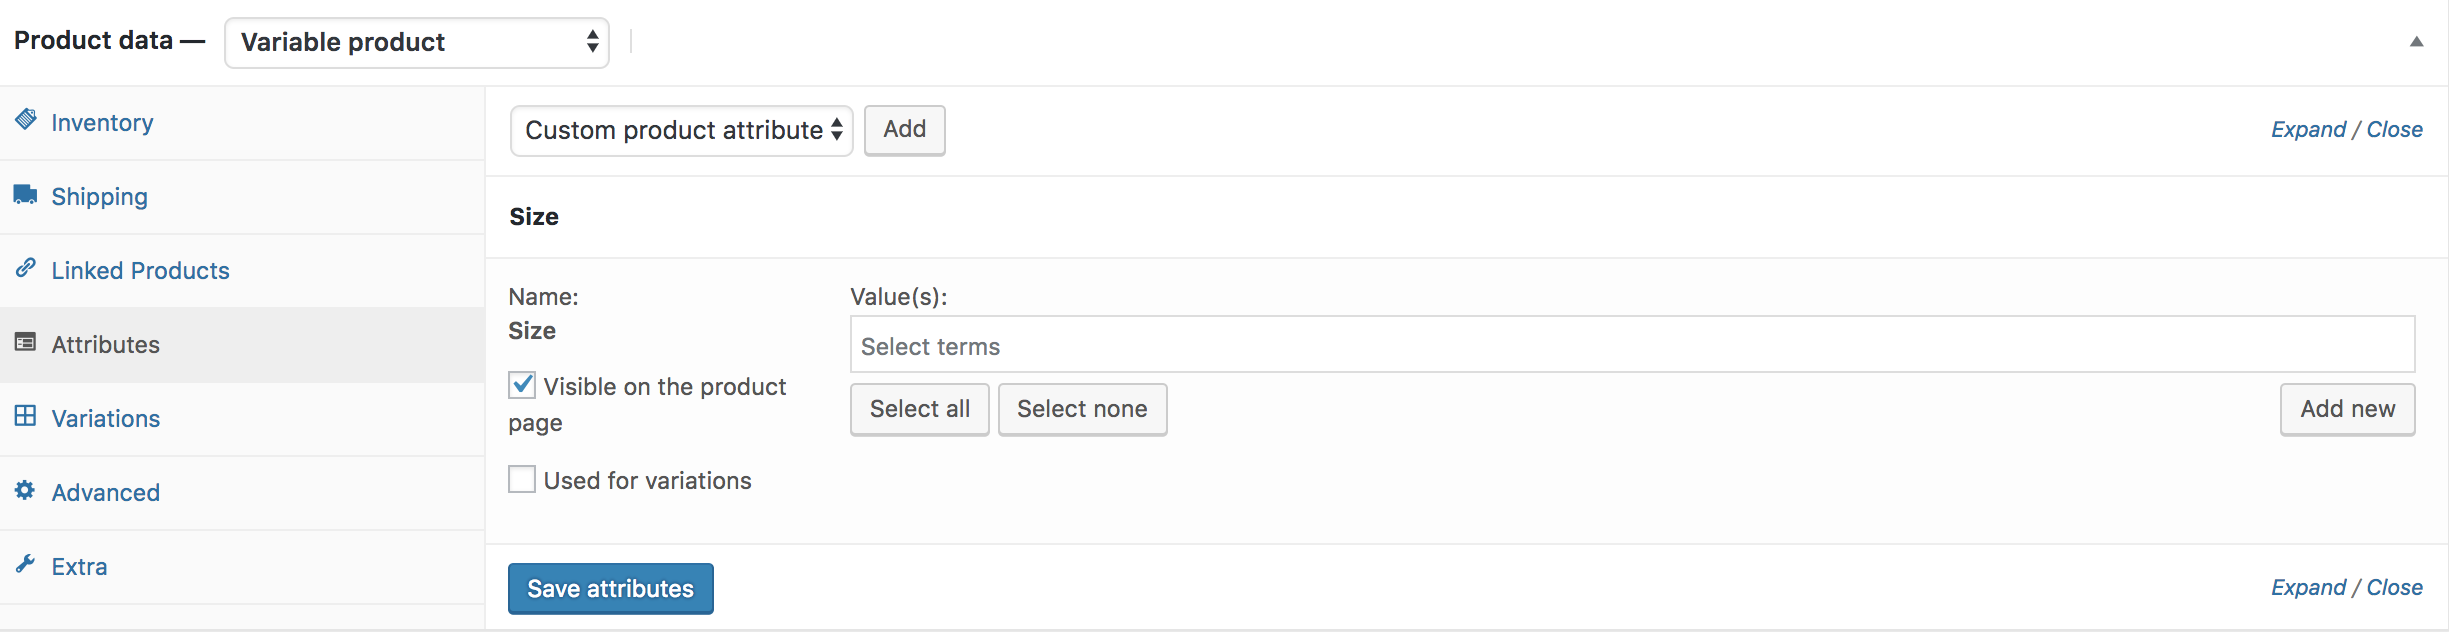
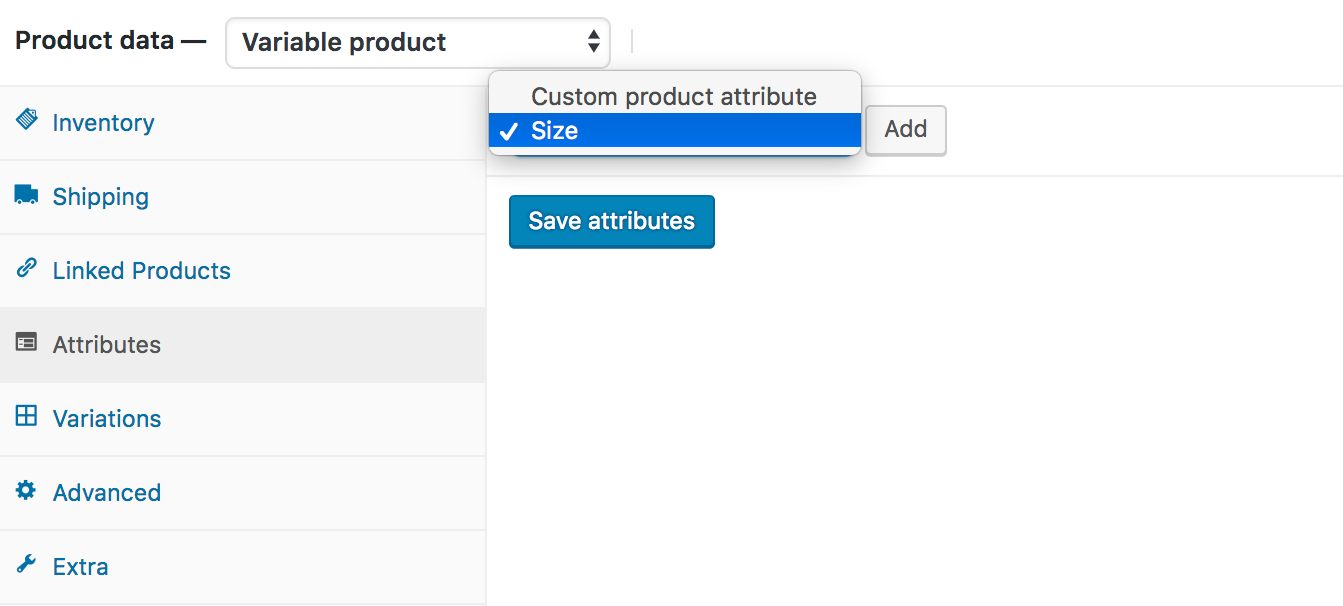 Now select the Size attribute and click on Add. You can see the following screens appears afterward.
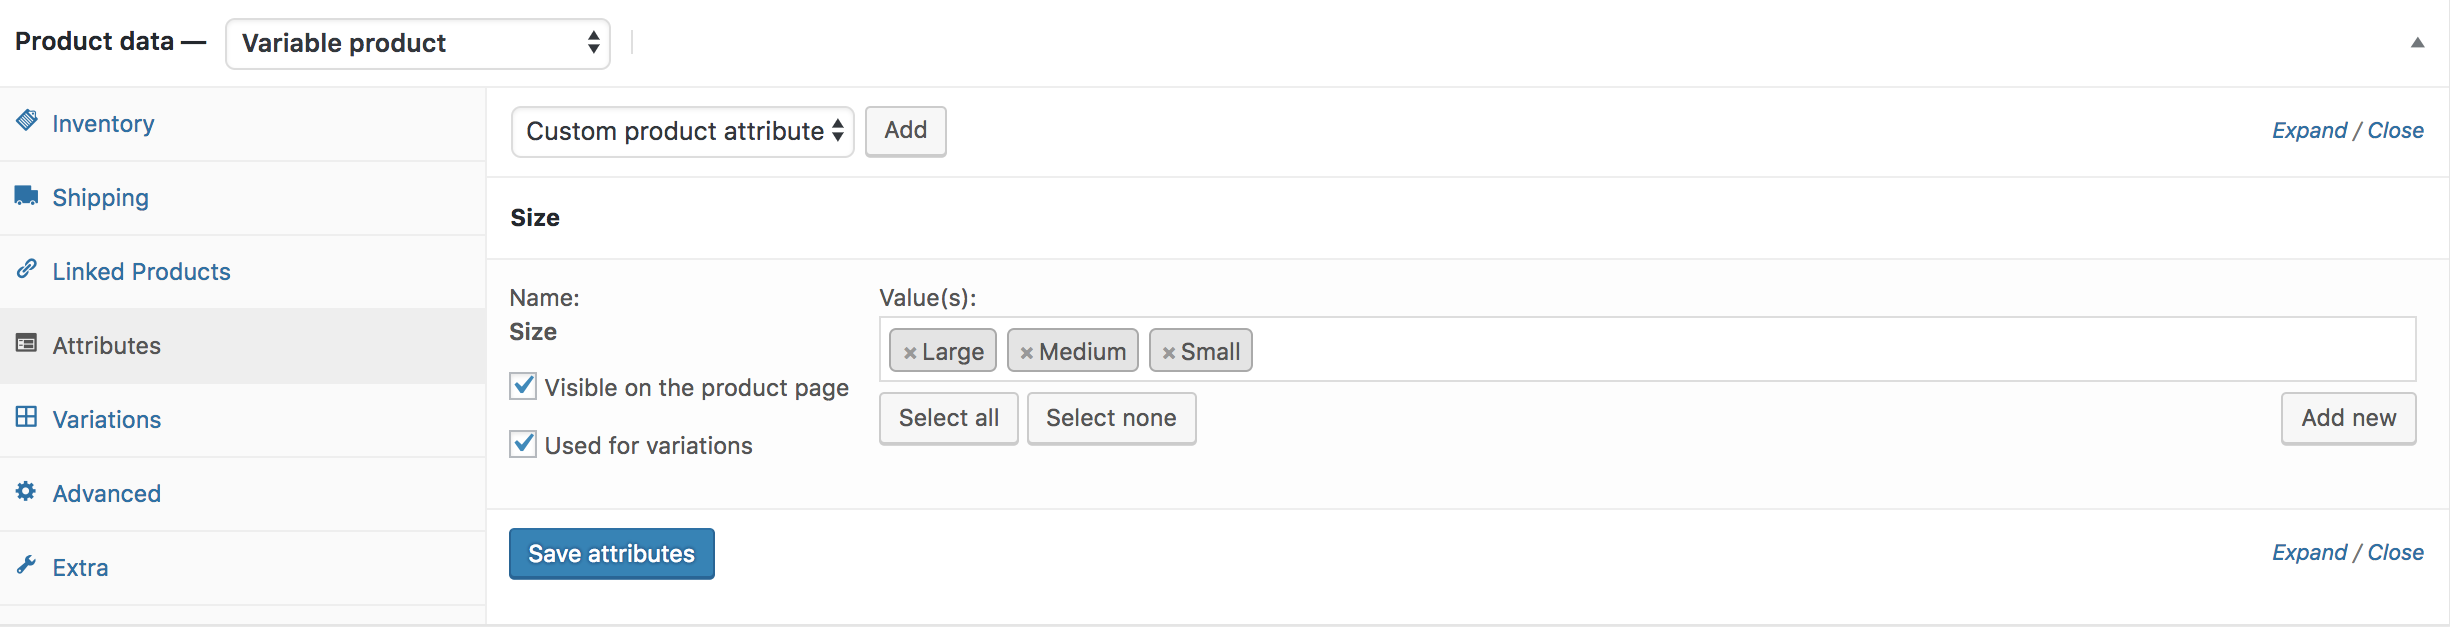
 If you want to select all available variations of the size attribute, click on Select all button. If you want to deselect all selected variations at once. Click on Select none button. Add all variations selecting Select All button, checked Used for variations settings and click on Save Attributes button. Check the following screenshot for guideline.
 In this tutorial, I am going to select Create variation from all attributes and click Go button. It’ll add all available variations like the following.
You can see the above image that Small, Medium, and Large image variations are there. From this screen you can add variation image, variation price, and other variation specific details. When you have done with adding all your required details in each variation, click the Save Changes button.
Remember! Don’t forget to add the price in each variation, otherwise, variations won’t be visible on the product frontend.
In this tutorial, I am going to select Create variation from all attributes and click Go button. It’ll add all available variations like the following.
You can see the above image that Small, Medium, and Large image variations are there. From this screen you can add variation image, variation price, and other variation specific details. When you have done with adding all your required details in each variation, click the Save Changes button.
Remember! Don’t forget to add the price in each variation, otherwise, variations won’t be visible on the product frontend.