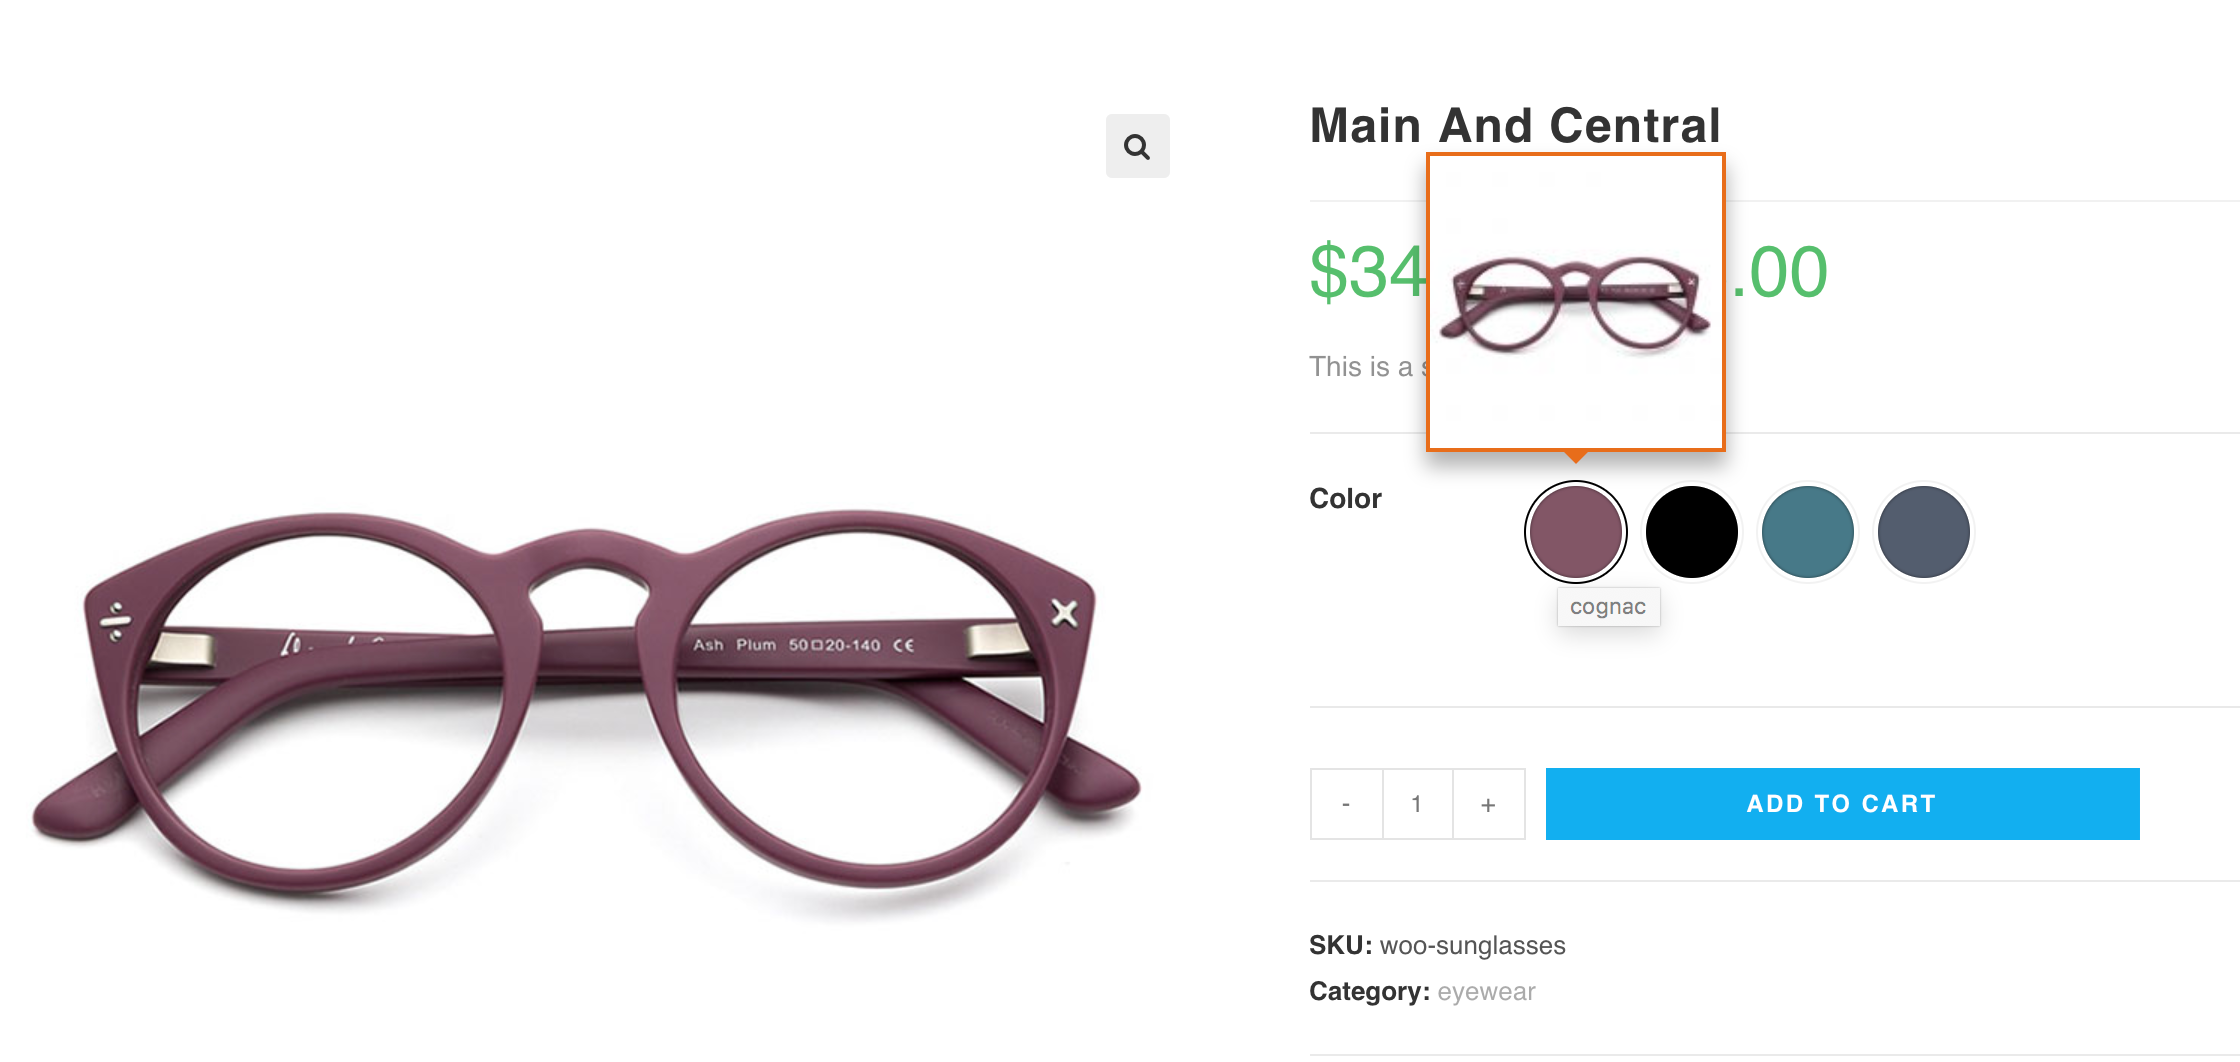
Frontend Preview
Video Tutorial
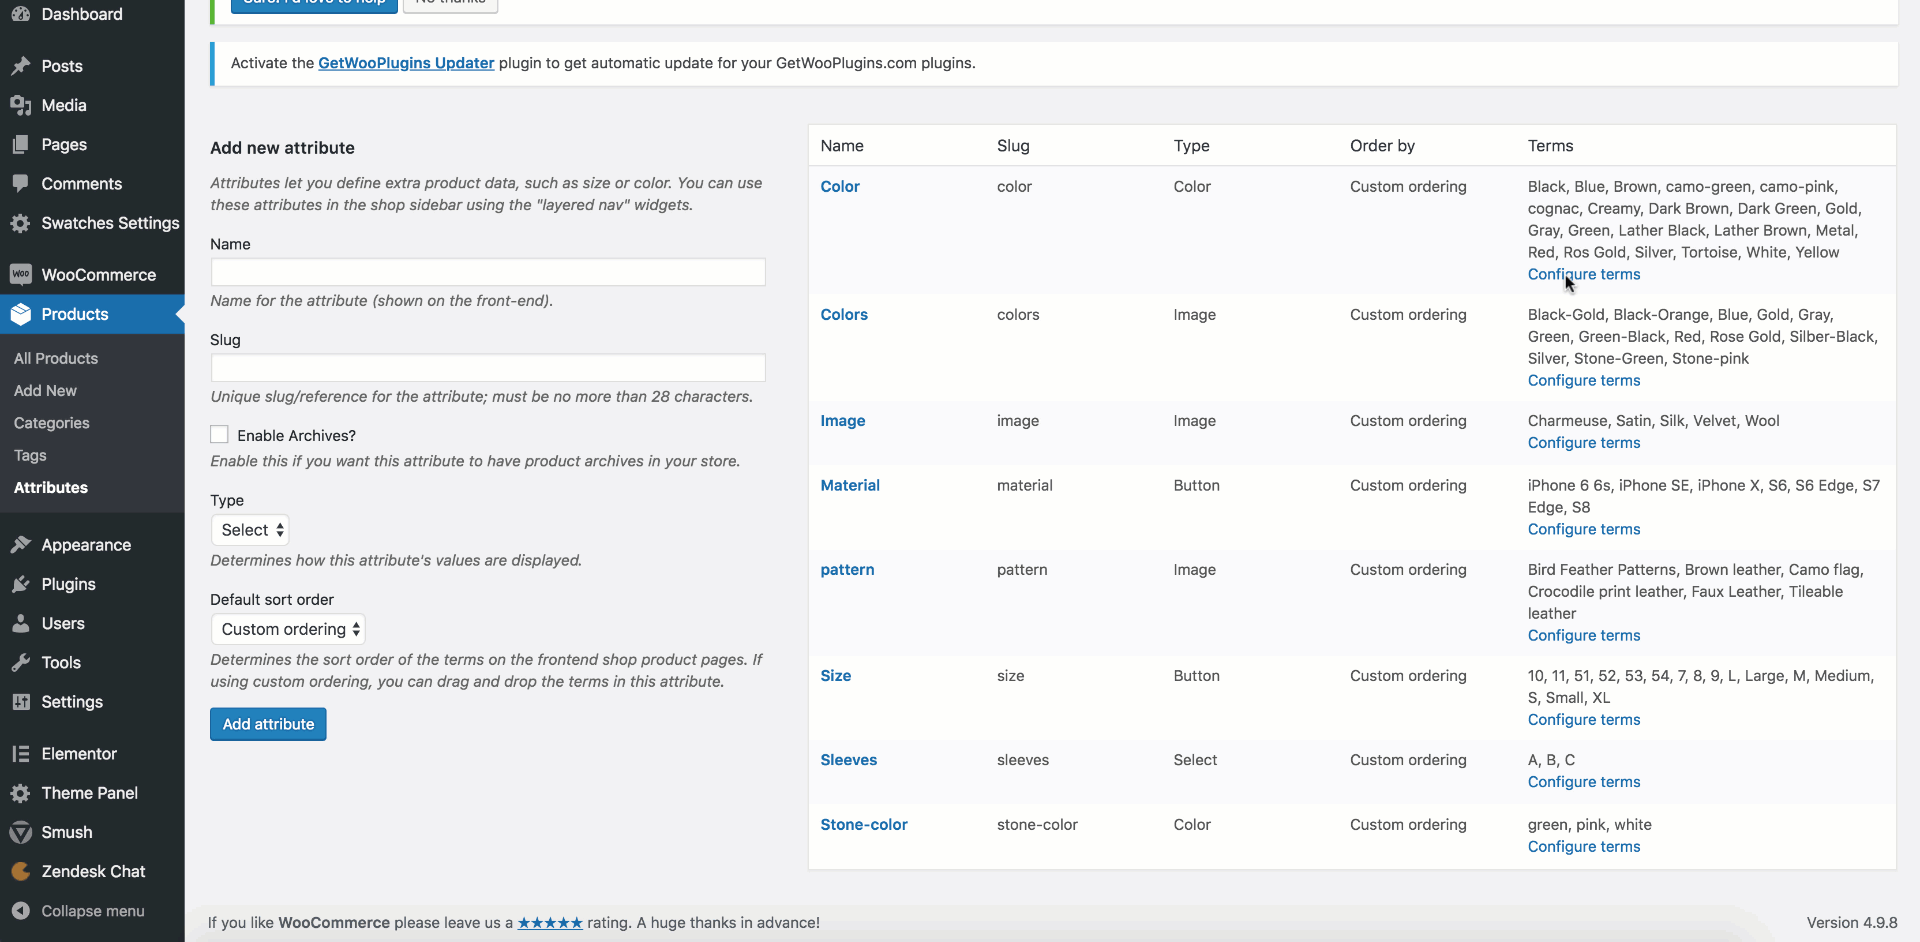
Step 01: Plugin Setup
It’s the premium feature WooCommerce Variation Swatches plugin. Make sure you have WooCommerce Variation Swatches Pro plugin besides the free version.Step 02: Image Tooltip Setup
Navigate to the Products >> Attributes and get into your desired variation edit mode select Configure Terms link from your desired attribute. When you are inside your selected variation edit mode, insert image as tooltip from Tooltip Image setting selecting Upload / Add Image button.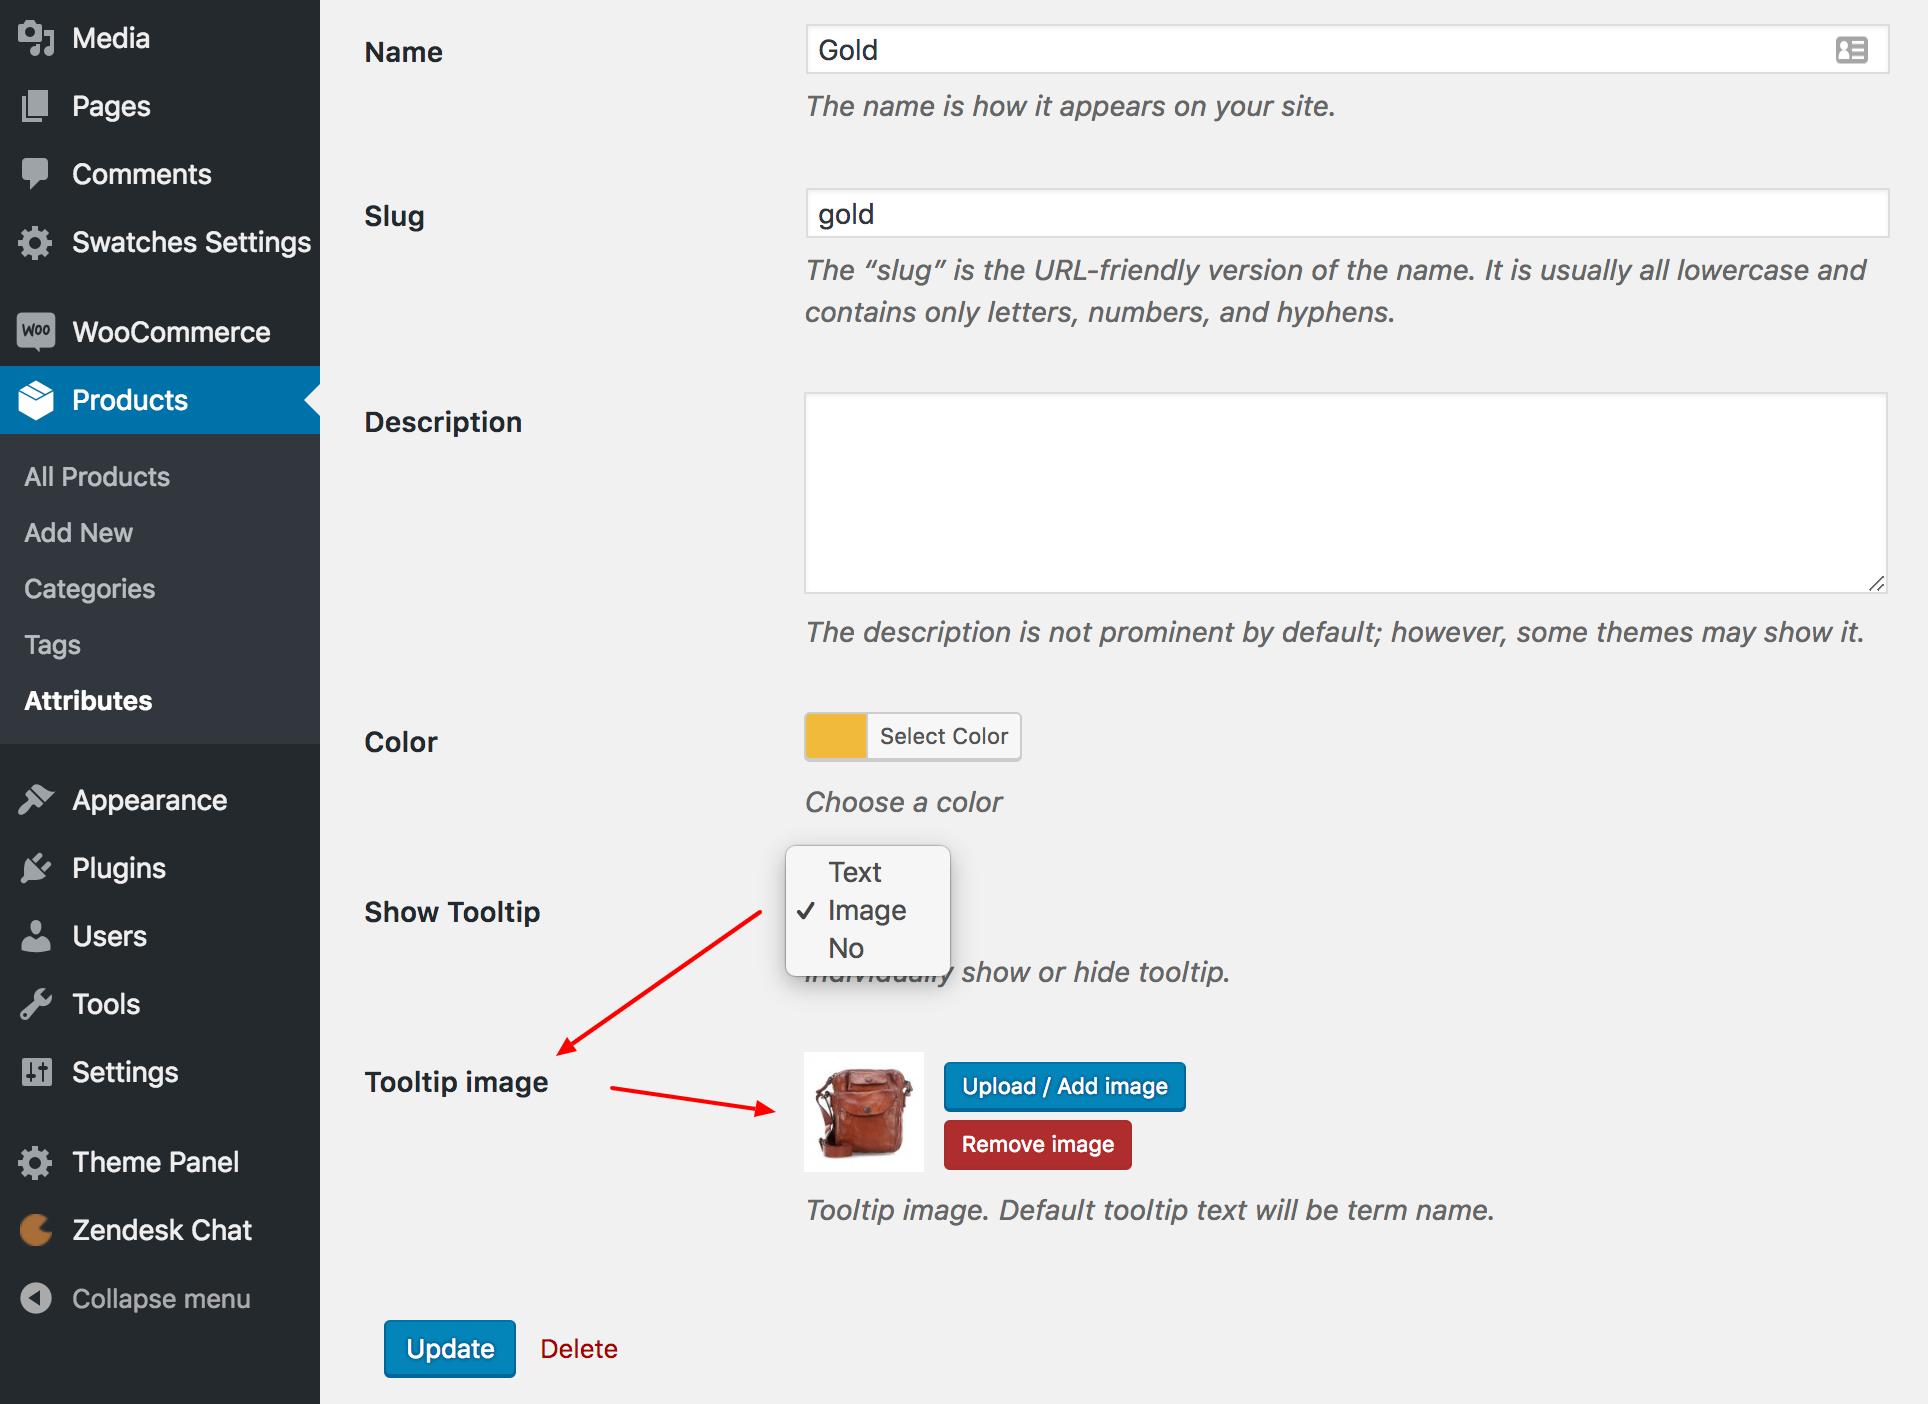 Now, the product connected with this variation will show this image as tooltip throughout the store.
Individual Product Settings
If you want to insert image tooltip image based product basis variation, WooCommerce Variation Swatches plugin has the option to that. To insert product basis variation swatches tooltip, head to product edit mode and get in Swatches Settings Tab from Product Data Setting.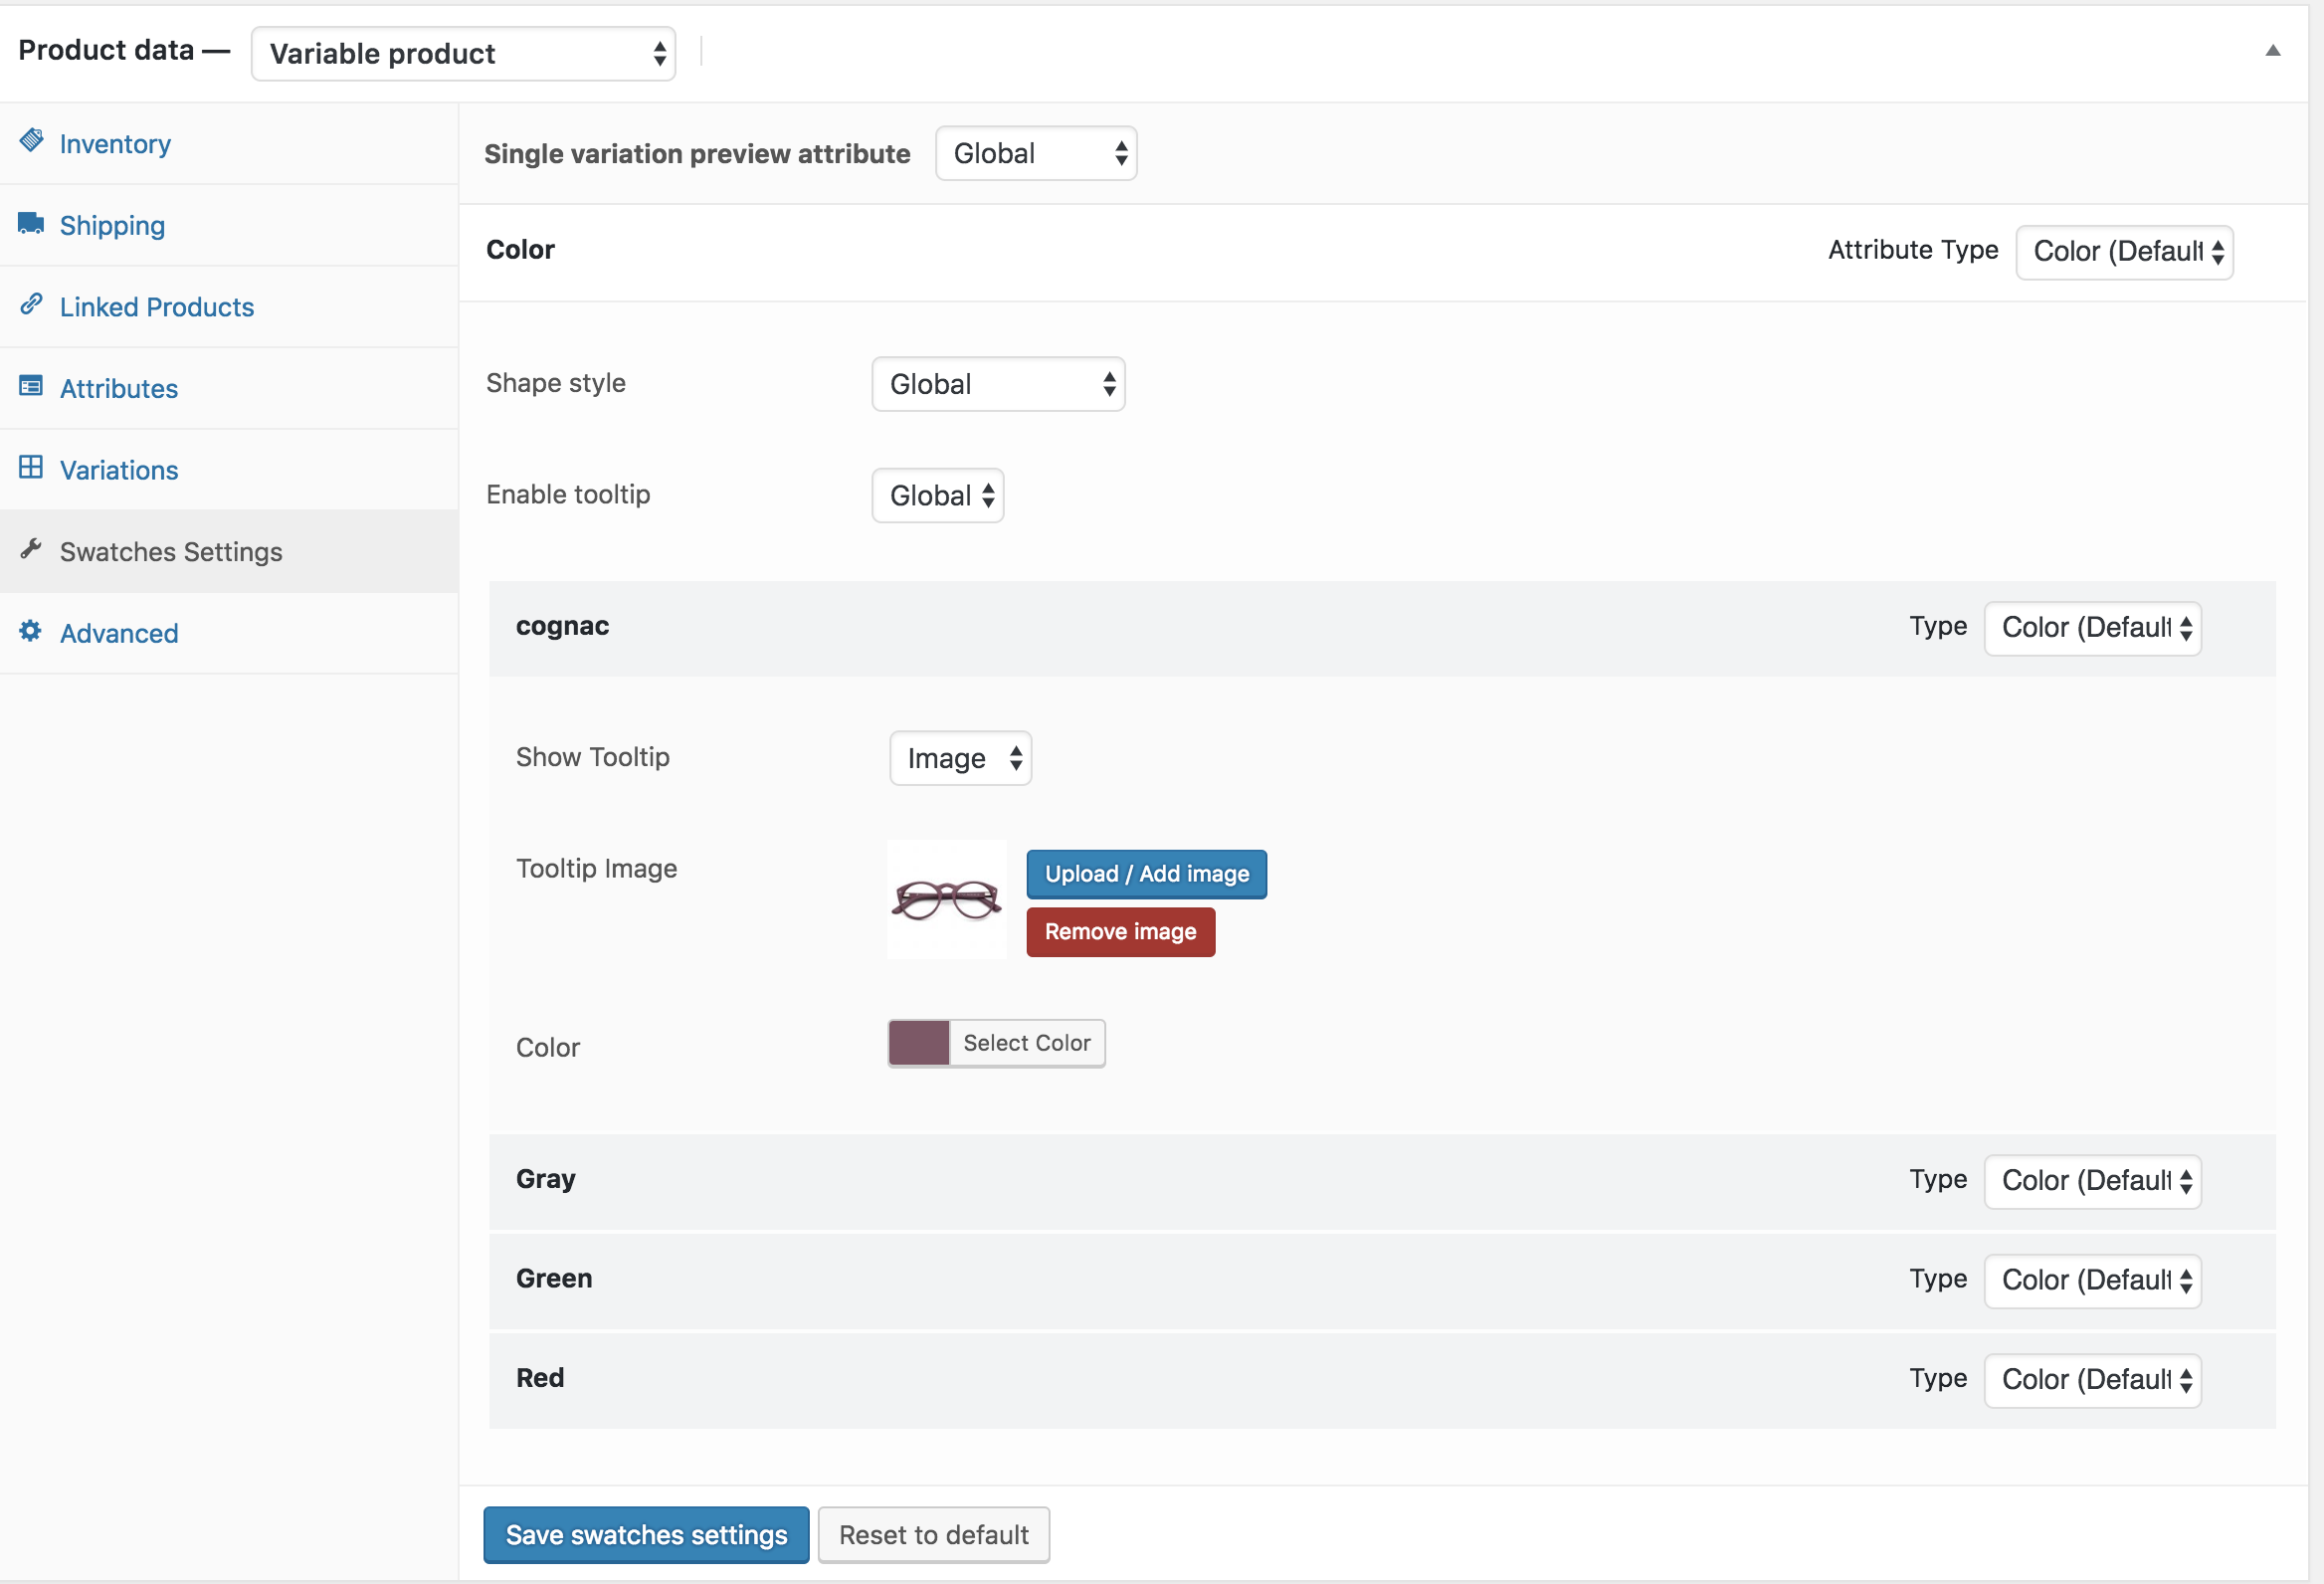 As you can see in Cognac variation, I’ve added new Tooltip Image Setting setting for this product variation. It’ll not show the globally added tooltip image from Products >> Attributes. After this, the frontend would look like the following image.